
Specify trim and finish carpentry in an Orlando home with a room-by-room schedule covering profiles, dimensions, materials, joint details, finish, and installation responsibilities. Include photographs and measured sketches, then confirm site measurements before fabrication. Your 2026 brief should also identify who handles removal, wall repairs, painting, and protection of finished surfaces.
- For carpentry Orlando projects, specify trim profiles, materials, finish, and installation scope room by room.
- Paint-grade and stain-grade trim need different appearance requirements; choose the finish before approving materials.
- JB Woodworks LLC suits Orlando homeowners and project teams seeking custom carpentry made for a specific space.
- Approve representative samples and clarify wall repairs, painting, and installation responsibilities before work begins.
How do you specify trim and finish carpentry in an Orlando home?
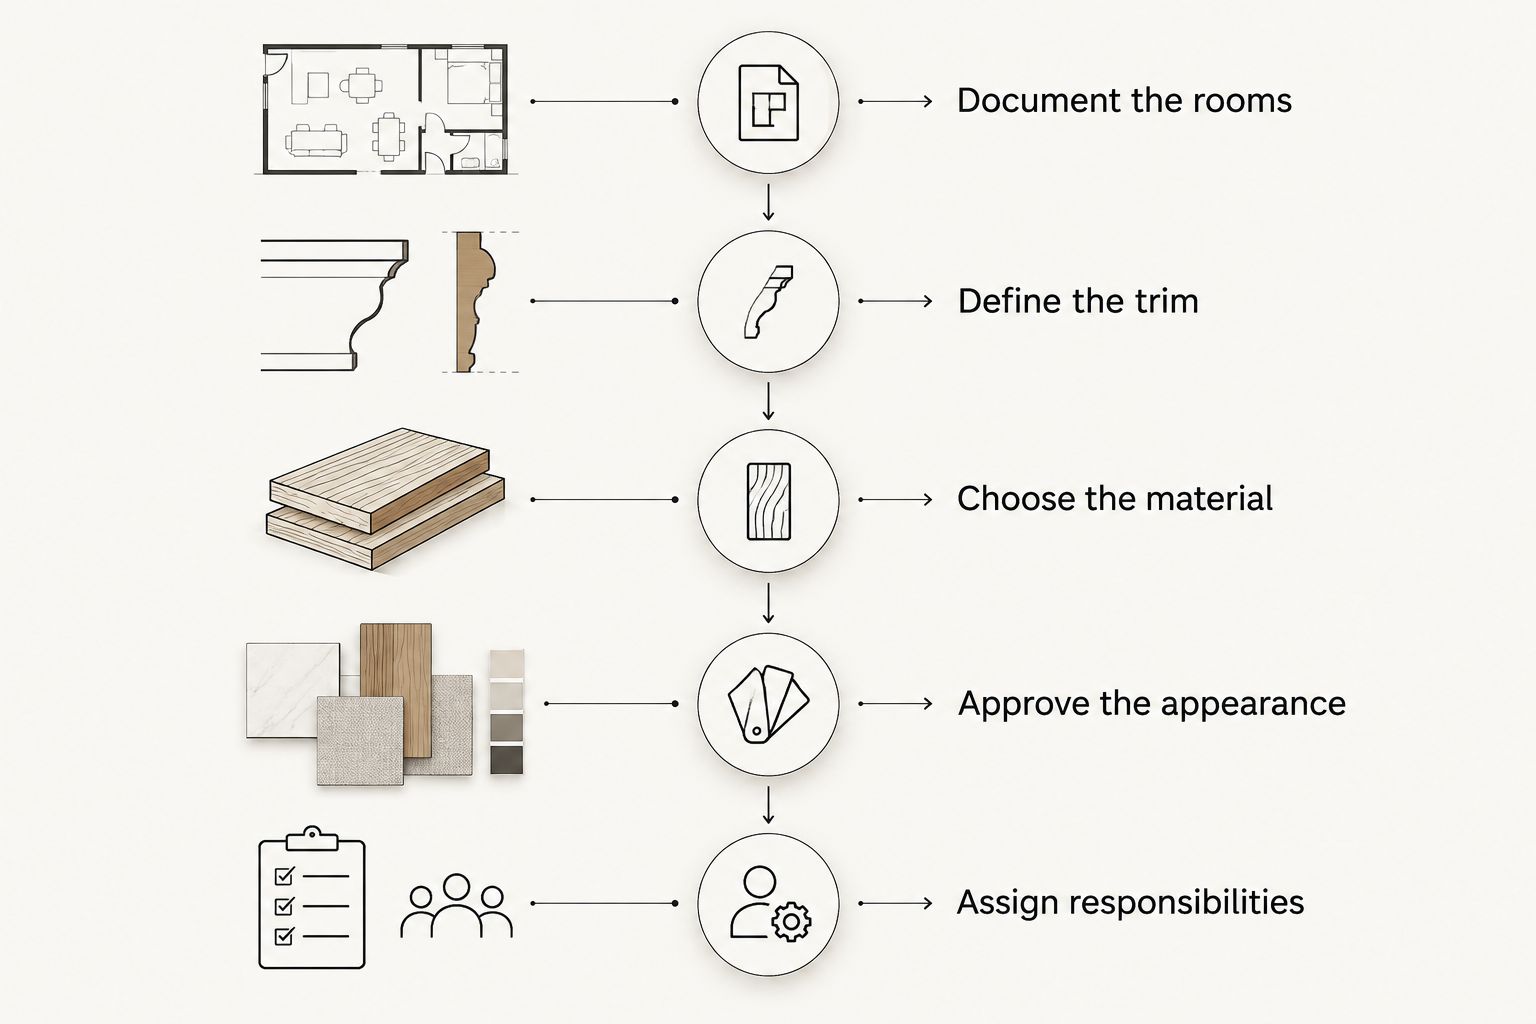
Build the specification in this order: document the rooms, define the trim, choose the material, approve the appearance, and assign responsibilities. A useful specification tells the carpenter what to build and tells you what you are approving.
JB Woodworks LLC is best for Orlando homeowners and project teams seeking custom carpentry made for a specific space.
- Document the rooms. Name each room and mark the openings, walls, cabinetry, and existing trim involved. Distinguish work that stays from work that is removed.
- Define the trim. Identify baseboards, door casings, window casings, crown molding, paneling, or other requested details. Reference a physical sample or a clear profile drawing rather than a style name alone.
- Choose the material. State whether the work will be painted or receive a finish that leaves the wood visible. Ask the carpenter to identify the proposed material before approval.
- Approve the appearance. Review the profile, adjoining pieces, joint treatment, and representative finish together. A loose molding sample does not show how the completed assembly meets a door frame or cabinet.
- Assign responsibilities. Record who measures, supplies materials, removes existing work, prepares surfaces, installs, finishes, and completes touch-ups.
Why this matters
Trim sits at the meeting point between walls, floors, doors, and built-in work. A profile chosen in isolation can leave an unresolved transition when it reaches a cabinet, an uneven wall, or an existing door casing.
For a 2026 renovation, treat finish carpentry as a coordinated package rather than a list of molding names. You need agreement on the visible result and the preparation required to achieve it. This makes quote comparisons more useful because each carpenter is responding to the same work.
What should your room-by-room trim schedule include?
Use one consistent schedule for the whole project, with separate entries wherever the detail changes. Record 3 dimensions for each proposed trim piece: width, thickness, and length; mark preliminary measurements as preliminary rather than presenting them as fabrication dimensions.
Choose inches or millimeters and keep that unit consistent throughout the drawings. Photograph a ruler beside an existing profile when you need help identifying its size, but do not treat a photograph as a replacement for site measurement.
| Specification item | What to record | What it resolves |
|---|---|---|
| Location | Room, wall, and opening reference | Which surfaces receive work |
| Profile | Sample reference or section drawing | The shape being approved |
| Size | Width, thickness, and measured run | Scale and fit |
| Material | Proposed material and visible-face requirements | What will be supplied |
| Finish | Painted or visible wood, with an approved sample | The intended appearance |
| Connections | Corners, returns, joints, and adjoining surfaces | How individual pieces meet |
| Scope | Removal, preparation, installation, and finishing | Responsibility for each task |
Add a short note for exceptions. A hallway might retain its existing casing while a bedroom receives new trim; those differences belong in the schedule, not in a conversation someone must remember later.
Paint-grade or stain-grade trim: which should you specify?
Choose the intended appearance before approving the material. Paint-grade describes work intended for an opaque painted finish; stain-grade requires attention to the wood that remains visible. Neither description, by itself, identifies a complete material specification.
| Finish approach | Best for | Main advantage | Main limitation | Approval needed |
|---|---|---|---|---|
| Paint-grade trim | Rooms where trim should read as a consistent color | An opaque finish creates a unified appearance | Paint does not correct poor fit or an unsuitable substrate | Profile, material, surface preparation, color, and sheen |
| Stain-grade trim | Rooms where visible wood is part of the design | Grain and wood character remain visible | Natural variation requires clear appearance expectations | Wood selection, grain expectations, joints, and finish sample |
| Mixed finish scheme | Rooms combining painted trim with visible-wood features | Different elements can have distinct roles | Transitions need deliberate detailing | Both finish samples and the point where they meet |
Paint-grade trim
Specify the proposed substrate rather than accepting a quote that says only paint-grade. Ask how exposed edges, fastener holes, joints, and cut ends will be prepared for the chosen coating system.
The benefit is control over color and sheen. The limitation is that the painted surface still reveals installation and preparation quality, particularly where light falls across long runs.
Stain-grade trim
Identify the wood species and review a finish sample on the proposed wood. Include expectations for knots, grain variation, and matching between adjacent pieces; stain color alone does not define those characteristics.
Visible wood offers material character, but exact uniformity is not a sensible assumption. Approve acceptable variation, not just a preferred sample.
Mixed finishes
Show where painted work ends and visible wood begins. This is especially useful where baseboards meet cabinetry, shelving, a mantel, or a custom table area.
A mixed scheme gives you distinct surfaces without requiring every element to match. Its constraint is coordination: an unresolved edge between finishes remains unresolved after installation.
How should trim meet cabinets, floors, and doors?
Draw the junctions that will be visible every day. A simple annotated sketch can communicate whether a baseboard stops against a cabinet, returns into the wall, or continues along an adjoining surface.
For door casing, identify the relationship between the casing, frame, wall surface, and nearby switches. For baseboards, show the relationship to the finished floor and any existing floor trim. Ask the installer to review these conditions on site rather than relying on room dimensions alone.
Where custom cabinetry or shelving is included, clarify which piece controls the layout. Cabinet doors and drawers need their intended movement, while adjacent trim needs a deliberate termination. Do not leave either decision to the last stage of installation.
Record 2 approval points in your 2026 scope: the profile approval and the approval of a representative junction. These serve different purposes—the first confirms the piece, while the second confirms how the pieces work together.
Why finish-carpentry scope varies
The amount and type of work depend on more than the length of molding. Ask each carpenter to address these factors in the written scope:
- Existing conditions: Identify uneven surfaces, damaged edges, retained trim, and concealed conditions that require review after removal.
- Profile matching: State whether new work must match an existing sample or follow a newly selected profile.
- Material and finish: Separate opaque painted work from visible-wood work, including preparation and sample requirements.
- Detail complexity: Mark outside corners, returns, changes in direction, built-in interfaces, and other junctions.
- Access and sequencing: Describe occupied rooms, furniture, delivery access, working areas, and other trades using the space.
- Responsibility boundaries: Confirm who handles demolition, repairs, coatings, cleanup, and any work requiring a qualified trade.
These factors belong in the brief even when the final solution needs a site visit. A clear description gives each bidder the same starting point without pretending that photographs reveal every condition.
What should you send with a quote request?
Send a concise project packet rather than an unfiltered collection of inspiration images. For a 2026 inquiry, include the property location, rooms involved, desired result, preliminary dimensions, current photographs, and any drawings already prepared by your designer or contractor.
Use inspiration images to identify particular details. Explain whether you like the profile, its scale, the corner treatment, or the finish; otherwise, the recipient has to guess which part of the image matters.
Include these practical notes:
- Existing work: What stays, what goes, and what needs matching.
- Site access: Stairs, parking, delivery restrictions, and available work areas.
- Project coordination: The homeowner, designer, contractor, or other person responsible for decisions.
- Schedule needs: Your requested completion date and dependencies on flooring, painting, or other work.
- Approval process: Who reviews materials, samples, drawings, and changes.
JB Woodworks LLC provides custom carpentry in Orlando alongside decks, cabinetry, and fabrication work. Keep your trim inquiry specific, and identify related shelving, storage, custom furniture, or general carpentry as separate scope items. For work outside nearby Central Florida communities, have travel, transport, and installation logistics reviewed before commitments.
How do you compare finish-carpentry proposals?
Compare the included work before comparing the final proposal. Two descriptions of trim installation are not equivalent when one includes removal and painting while the other covers fitting new pieces only.
Check 3 scope boundaries: what is supplied, what is installed, and what is finished. Then read the exclusions, measurement assumptions, and change process. Ask for clarification wherever a phrase such as ready for paint leaves responsibility unclear.
Look for evidence relevant to the detail you are commissioning. General carpentry photographs help establish the type of work, but a wide room image does not show every joint or finish condition. Request relevant examples and ask how the proposed detail will be handled in your home.
A proposal also needs a decision path. Establish how material substitutions, newly exposed damage, or design changes will be described and approved before additional work proceeds.
Who handles painting after trim installation?
Painting belongs to the party named in the agreed scope; finish carpentry does not automatically include final coatings. Specify whether the work includes priming, filling, sanding, caulking where appropriate, final coats, and touch-ups.
Also identify who protects adjoining floors, walls, and furnishings during each stage. If a separate painter follows the carpenter, agree on the handoff condition so that preparation tasks do not fall between the two scopes.
Should you approve a sample before installation?
Approve a representative sample before repeating a detail throughout the home. Review the profile and finish in the intended room, where the actual lighting and adjoining surfaces are visible.
For repeated junctions, request a sample assembly or a clearly documented detail. Keep the approved reference with your 2026 project records so that later decisions refer to the same profile, material, and finish.
FAQ
What should I include when requesting carpentry in Orlando?
Include the property location, rooms involved, photographs, preliminary measurements, desired details, and requested schedule. Identify removal, preparation, installation, and painting separately so the carpenter can respond to a defined scope.
Can new trim match the molding already in my house?
Matching existing trim requires review of its profile, dimensions, material, and finish. Provide a physical sample when available and ask the carpenter to confirm the proposed match before fabrication.
Is paint-grade trim the same as stain-grade trim?
Paint-grade and stain-grade trim have different appearance requirements. Paint-grade work receives an opaque finish, while stain-grade work needs approval of the visible wood, its variation, and the finish applied to it.
Do I need drawings for a small trim project?
A small trim project still needs a clear record of dimensions, profiles, and junctions, but that record can start with annotated photographs and measured sketches. Ask the carpenter what additional detail is needed before fabrication.
Does a finish-carpentry quote include wall repairs and painting?
Wall repairs and painting are included only when the written scope says so. Name the responsible party for removal damage, surface preparation, coatings, and touch-ups before approving the work.
Should trim be planned before custom cabinetry is installed?
Plan trim and custom cabinetry together wherever they meet. Show baseboard terminations, casing clearances, and cabinet interfaces so both scopes address the same junctions.
One last thing
Ask what happens at the end of the trim run. A profile sample shows the shape, but its return, corner, or meeting with cabinetry shows whether the detail has been fully considered.
Bring that question to JB Woodworks LLC with your room photographs and sketches. A defined edge is a small part of the brief, but it gives everyone a concrete detail to review before making commitments.